Polycraft Water Clear Epoxy Resins – Introduction and tips for success
Polycraft Water Clear Epoxy Resins – Introduction and tips for success

Introduction
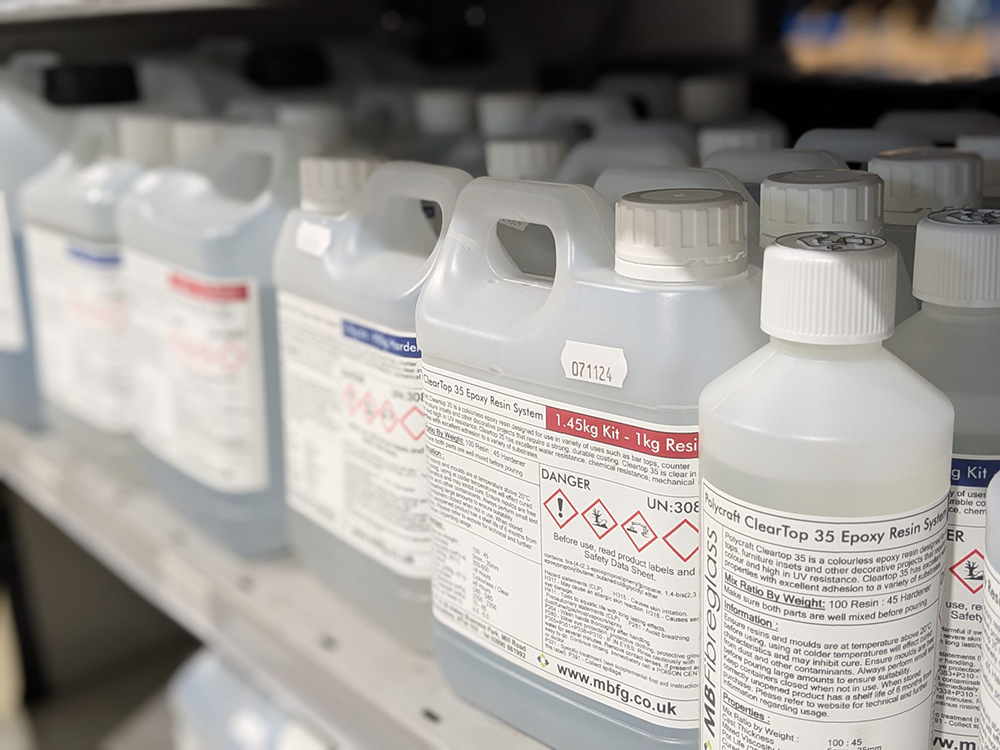
Polycraft’s range of clear epoxy resins are very versatile materials that are extremely popular in various applications from crafts, woodworking, home improvements and artistic projects. These materials are known for their durability, clarity, and strong adhesive properties, making them an excellent choice for both DIY enthusiasts and professional users. In this blog post, we will discuss the equipment needed and share tips and tricks for using Polycraft clear epoxy resins effectively, helping you achieve the best results for your projects.
What is Clear Epoxy Resin?
Clear epoxy resin is a two-component system consisting of a resin and a hardener. When mixed, these components undergo a chemical reaction that creates a strong, durable, and transparent finish. This makes clear epoxy resin a popular choice for coating surfaces, casting, and encapsulating objects.
Some items you may need when working with epoxy
1. Epoxy kit of your choice (see links at bottom)
2. Mixing containers
3. Mixing sticks
4. Gloves
5. Protective Eyewear
6. Digital Scales (some resins system may also offer a volume measurement)
7. (Optional) Heat gun or gas torch (for bubble removal, particularly useful on surface coatings)
Depending on the application, you may also need the following:
1. Wet & dry paper
2. Masking tape (for edges etc.)
3. Protective covering (to protect surfaces from drips / spills).
4. Protective face mask
5. Solvents for preparation / Cleanup
Mix Ratio
Check whether the epoxy is measured by weight or volume. It’s essential to understand that these two systems of measurement are not typically interchangeable so pay attention to the labels and technical datasheets.
Quality of Mix
Improper mixing can lead to curing issues, so it's crucial that the two components of the epoxy kit are thoroughly mixed. When you first combine the materials, you may notice that the mixture appears hazy. As you continue to stir both parts together, the clarity will return. It’s important to mix until the material is clear, and ensure there are no visible streaks of unmixed material. Remember to scrape the sides and bottom of the mixing vessel. A recommended practice is to transfer the mixed materials from the primary mixing vessel to a secondary mixing vessel and mix again. This method greatly reduces the chances of uncured streaks of resin in the finished product. For faster-setting resins, keep in mind that your pot life will be limited; spending too much time mixing can shorten your working time.
Humidity
The Polycraft water-clear epoxy systems use an amine-based curing agent that can absorb moisture from the air. In high humidity environments, moisture levels can affect the surface finish. Depending on the conditions, this can result in a tacky or greasy surface, a phenomenon commonly referred to as amine blush. As a result, the top surface may have a lesser quality finish compared to when used under optimal conditions. For best results, it is recommended to maintain humidity levels below 70%.
Temperatures
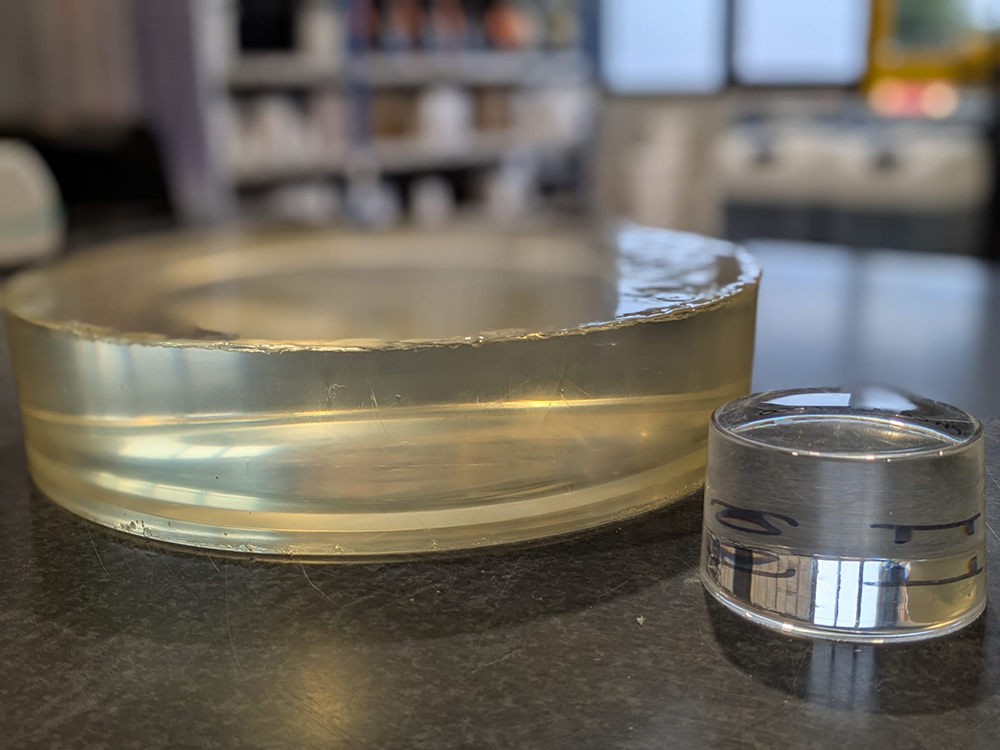
Epoxy resins are sensitive to temperature, making it essential to consider various factors, including the temperature of the resin itself, the working environment, and the temperature of the mould or surface, depending on your application. The Polycraft water-clear epoxy systems are designed for use and curing at typical room temperatures, ideally between 18°C and 25°C, to achieve optimal results. If temperatures exceed 25°C or drop below 18°C, the performance of the epoxy may be compromised. In certain situations, slightly cooler conditions may be more suitable for large castings. Conversely, for small amounts or thin layers of resin, raising the temperature can expedite curing without causing overheating issues. Some testing may be necessary to determine the best approach.
(Photo Of Large Casting (Left) Which Has Gone Amber Due To Mild Overheating In Comparison To The Small Casting (Right) Which Cured Without Issue)

Resin quantities and Pot life
The pot life indicated on the product label is based on typical quantities of approximately 150g to 200g in a temperature-controlled environment. Cooler temperatures can extend pot life, while higher temperatures may shorten it. Additionally, the amount of resin mixed can also affect pot life; larger quantities will reduce it, whereas smaller amounts will likely result in a longer pot life.
Curing Times
Cure time depends significantly on the temperature and the thickness of the casting. During this period, it’s essential to protect the surface from dust and debris. For specific information on cure and demould times, refer to the technical datasheet for your chosen epoxy kit. You can use your judgment to determine if the resin system is ready. However, attempting to abrade or polish before the resin has reached the proper state of cure may result in a soft and gummy texture, making polishing challenging and achieving a glossy finish difficult. Abrading under-cured epoxy is not recommended. While the resin is still curing, the dust created can be more hazardous than after the resin has completely cured, so it is best to avoid abrading during this stage. Always take appropriate safety precautions when working with the materials.
Moisture Tolerance
The Polycraft water clear epoxy systems are moisture-tolerant and can cure in the presence of small amounts of moisture. However, excessive moisture can lead to negative effects, such as cloudy streaks or poor surface texture resulting in a hazy finish. When using materials like concrete, natural wood, and manufactured wood products, it's essential to ensure that these materials are thoroughly dried before applying the epoxy.
Sealing Coat
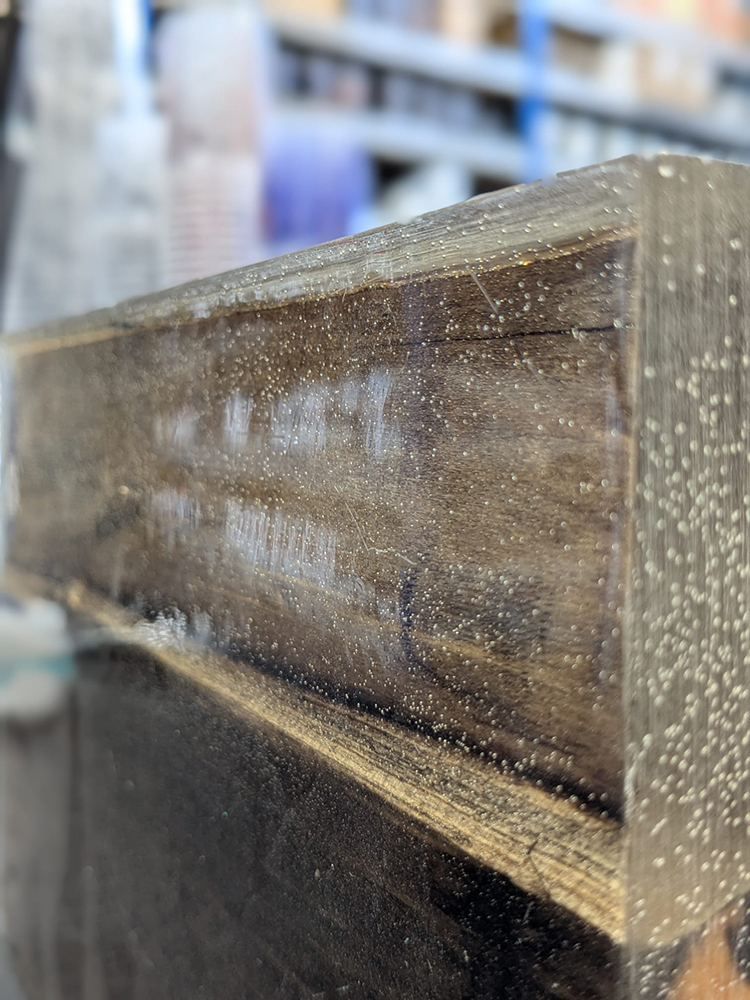
Concrete, ceramics, and both natural and manufactured wood products should ideally be sealed. Sealing the surface of porous materials can enhance the overall finish by preventing air trapped in the materials from escaping into the resin during the curing process. It also aids in self-levelling by reducing resin absorption into the substrate. For this purpose, an epoxy sealer such as Hempel 599 or a coat of Polycraft Cleartop 5 can be used. Once cured, it's important to clean the surface with hot water and a lint-free cloth. After cleaning, abrade the surface and ensure it is dry before continuing to pour the resin layer.
(Photo showing air release from unsealed wood)

Resin Layering / Multiple Pours
The Polycraft water-clear epoxy systems can be poured in multiple layers to achieve the desired thickness. However, one downside of this method is the visibility of layer lines in the casting. If you wait too long between pours, these lines can become prominent. To minimize this issue, it's best to pour when the resin is in the gel stage—partially cured but stable enough to support the weight of the next layer. This approach eliminates the need for additional surface preparation. It's also essential to consider the depth of each layer to avoid overheating. You'll need to experiment with the pot life timing and casting depths to determine what yields the best results. Alternatively, you can allow the resin to fully cure between layers. In this case, wash the surface with hot water and a lint-free cloth to remove any potential amine blush. Once cleaned and dried, key the surface with abrasive paper (around 120 grit or similar). Afterward, clear the surface of any dust or debris using a solvent, such as isopropanol alcohol, then prepare to pour the next layer of resin to hide any marks left by the abrasive paper.
Pigmentation
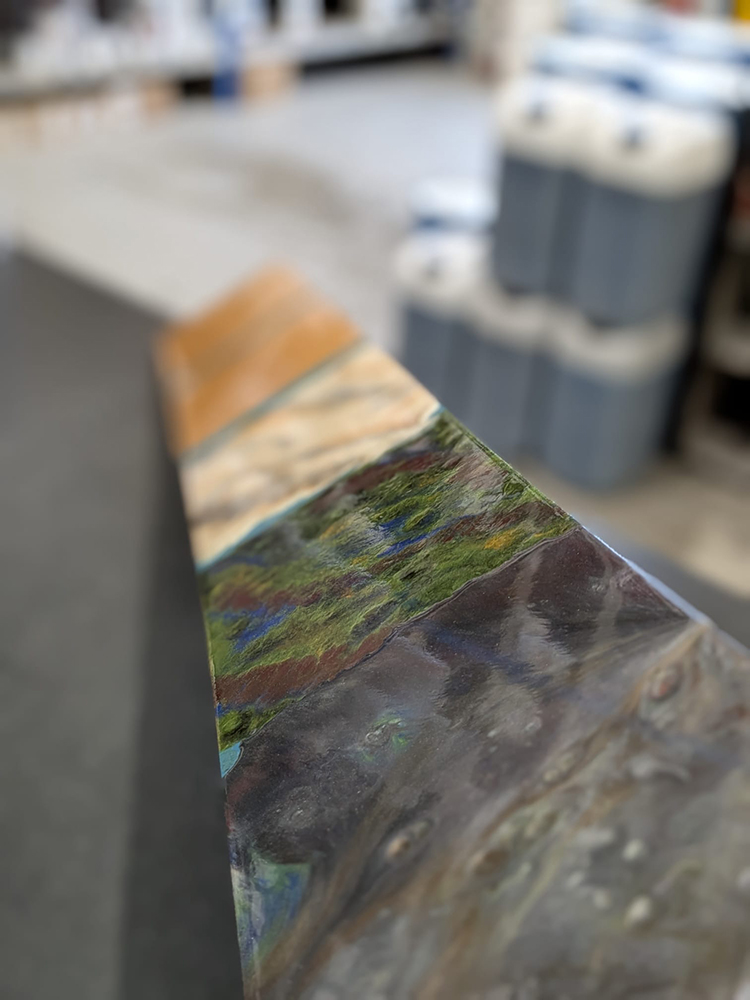
Pigments, dyes, pearlescent and luminescent materials, and metal powders can all work well with the Polycraft Cleartop 5 epoxy system. However, for deeper pours, heavier metal powders and pigments may sink and settle at the bottom due to the longer curing time of the slower-setting epoxy. Similarly, very light pigments may float on the surface. To find the right quantity of pigment needed, conducting small-scale trials is advisable, especially if you are unsure about product compatibility. This approach can help you determine if the pigment will negatively affect the resin system. Epoxy-specific paste pigments and dyes usually have a recommended maximum addition due to the carriers they contain. Before starting your main project, it's often beneficial to create a few resin samples using your selected pigments or dyes in chosen ratios. This will give you a better idea of what to expect in your final project.
(Photo showing a variety of pigments used)

Trapped Air / Surface Bubbles
The Polycraft water-clear epoxy systems are formulated with additives that help disperse air in the mix. However, multiple factors can influence how much air remains in the mixture. Factors such as the temperature of the resin, the method of mixing (whether by hand or with a drill), the depth of the cast, and the substrate onto which the resin is being poured etc. After a few minutes from the initial pour, you can lightly pass over the surface with a heat gun or gas torch set to low to help break the surface tension and release any bubbles. It’s important to keep this pass very brief—applying heat continuously or holding the flame in one spot for remotely to long can damage the resin surface. Allow the heat from the gun or torch to dissipate before making another pass. If the resin has begun to gel, it’s likely too late for this method to be effective, as any trapped air may pop, but the resin in its gel state won't be able to fill the void left by the bubble. Use this technique with great care. Remember, the heat gun or gas torch should only make a quick pass over the surface to avoid damaging the resin. Proceed with caution when using this technique.
Resin Quantities / Coverage
To determine the weight requirement for your resin simply take your volume and multiple that value by the resin’s density.
For example the Polycraft Cleartop 5 has an average density of 1.11
1 litre x 1.11 = 1.11KG
As where the Polycraft ECR80 has an average density of 1.13, the equation would be
1 litre x 1.13 = 1.13KG
Cold Weather / Resin Crystallisation
Cooler temperatures in the UK and Ireland, especially from mid-autumn to mid-spring, are not ideal for using water-clear epoxy systems without prior preparation such as ensuring the resin, environment and substrate are at the correct temperature etc. These cooler conditions can increase the likelihood of crystallization in the resin, which may occur even at room temperature under certain circumstances, though this is less common. The appearance of the resin can vary depending on the level of crystallization, ranging from small white lumps within or on the surface to a hazy or milky white appearance. In extreme cases, the resin may completely solidify. Crystallization occurs due to a phase change similar to water turning into ice. Fortunately, this process is easily reversible by warming the epoxy component to 60°C. It is crucial to ensure that any crystals are thoroughly removed, as any remaining crystals can act as seeds for further crystallization. Laboratory results indicate that the heating cycle to eliminate crystals can be repeated several times without significantly affecting the resin's properties. We recommend maintaining the resin system at a suitable room temperature whenever possible. After each use, clean the lids and necks of the containers with isopropyl alcohol or acetone, allowing the solvent to evaporate before replacing the lid. This practice helps reduce the chances of crystallization. If you mix partially crystallized resin with the hardener, it is highly likely that the lumps or hazy finish will persist, negatively affecting the overall finish. Therefore, it is essential to ensure that the resin component is free of crystals before proceeding with your project.
Safety Precautions
Before you begin, we strongly recommend reading the technical and safety datasheets to gain a thorough understanding of the materials for your project. Working with epoxy can be safe if you take the necessary safety precautions.
Conclusion
By following these steps and taking the necessary precautions, you can successfully use epoxy resin in your crafting, DIY projects, or professional applications. Whether you’re creating a stunning table top, encapsulating a cherished item, or designing unique art pieces, the Polycraft clear epoxy resin systems offer a fantastic medium to explore.
Polycraft Water Clear Epoxy resins: https://www.mbfg.co.uk/epoxy-clear-casting-resin.html
Ancillaries (mixing cups / sticks etc) : https://www.mbfg.co.uk/ancillaries.html
